
printmaking
Printmaking is one of my go to projects on a rainy day or when the kids are bored. It’s easy, it’s a great change of pace from just drawing or painting, they love the process of carving their design, are excited to use the brayer, and even though we’ve done this many times, they’re always amazed at how the final print looks compared to their carving!
What you will need:
Paper for sketching
Paper Cutter (or scissors)
Dull pencils
Inking plate (we used a paper plate)
White paper for printing – this can really be any type of paper…I usually use either cardstock or just a white drawing paper (unless you’re using white block printing ink…then you’ll want to use a colored paper)

Step 1 - Plan and prep
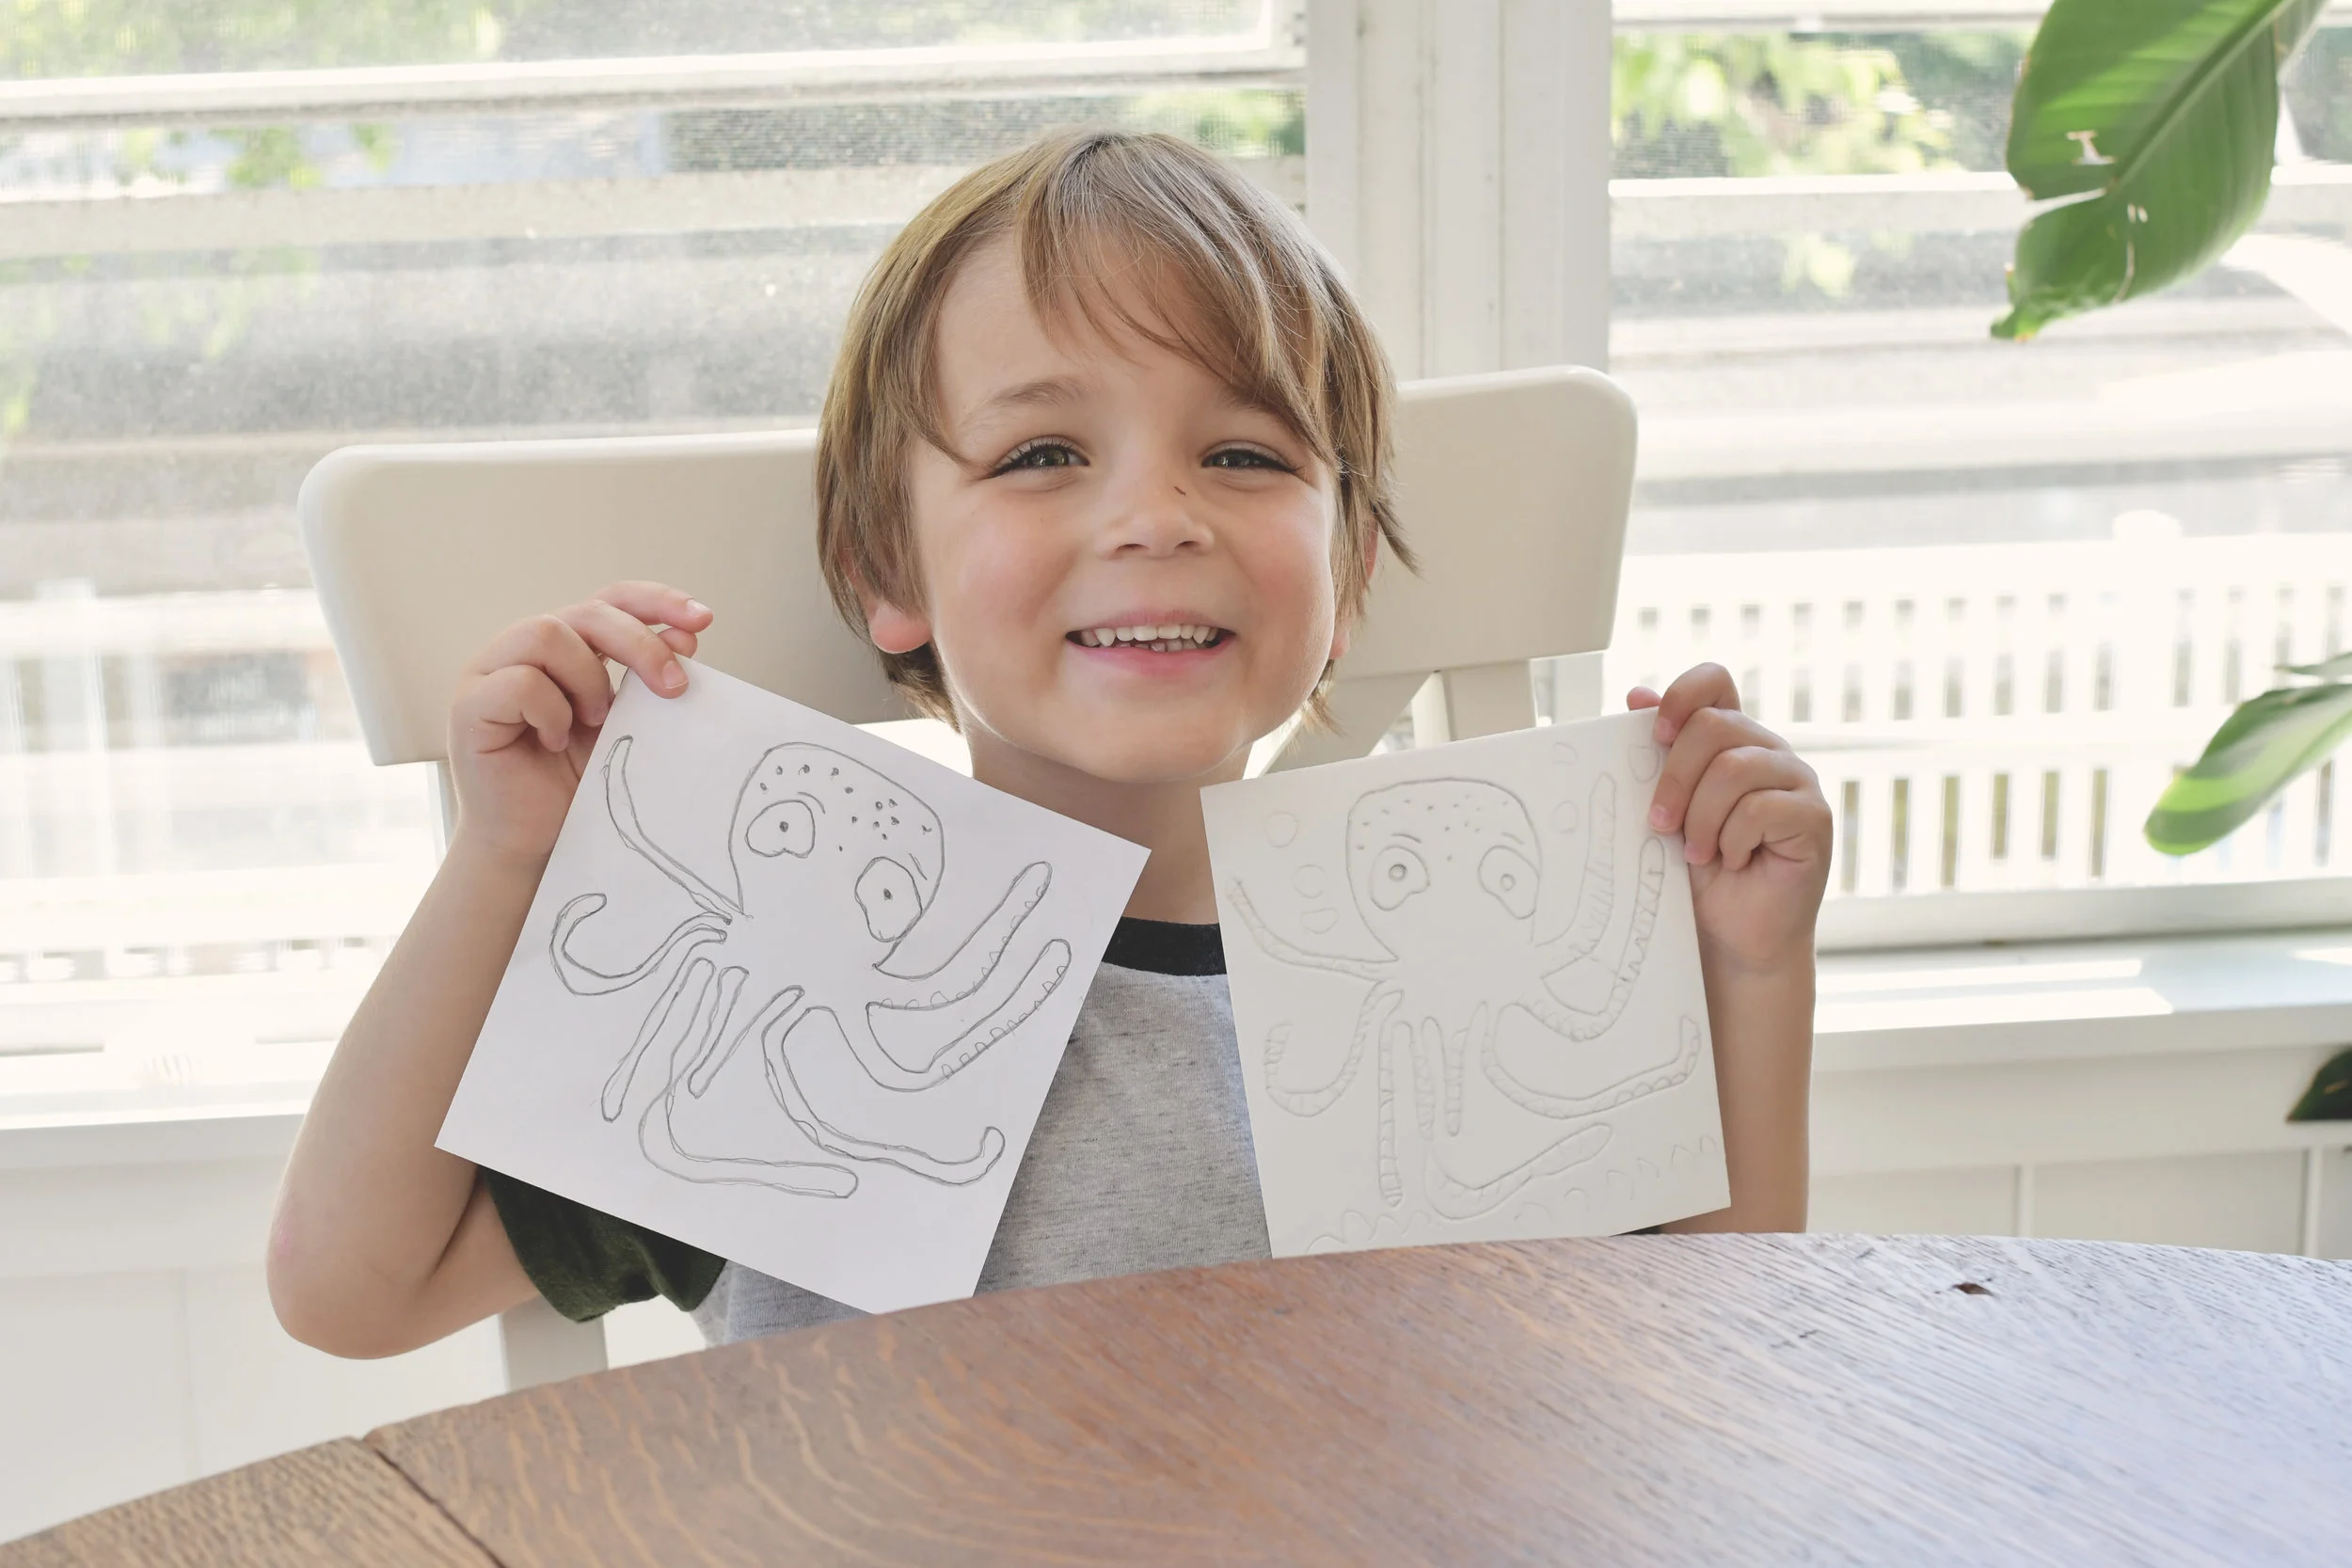
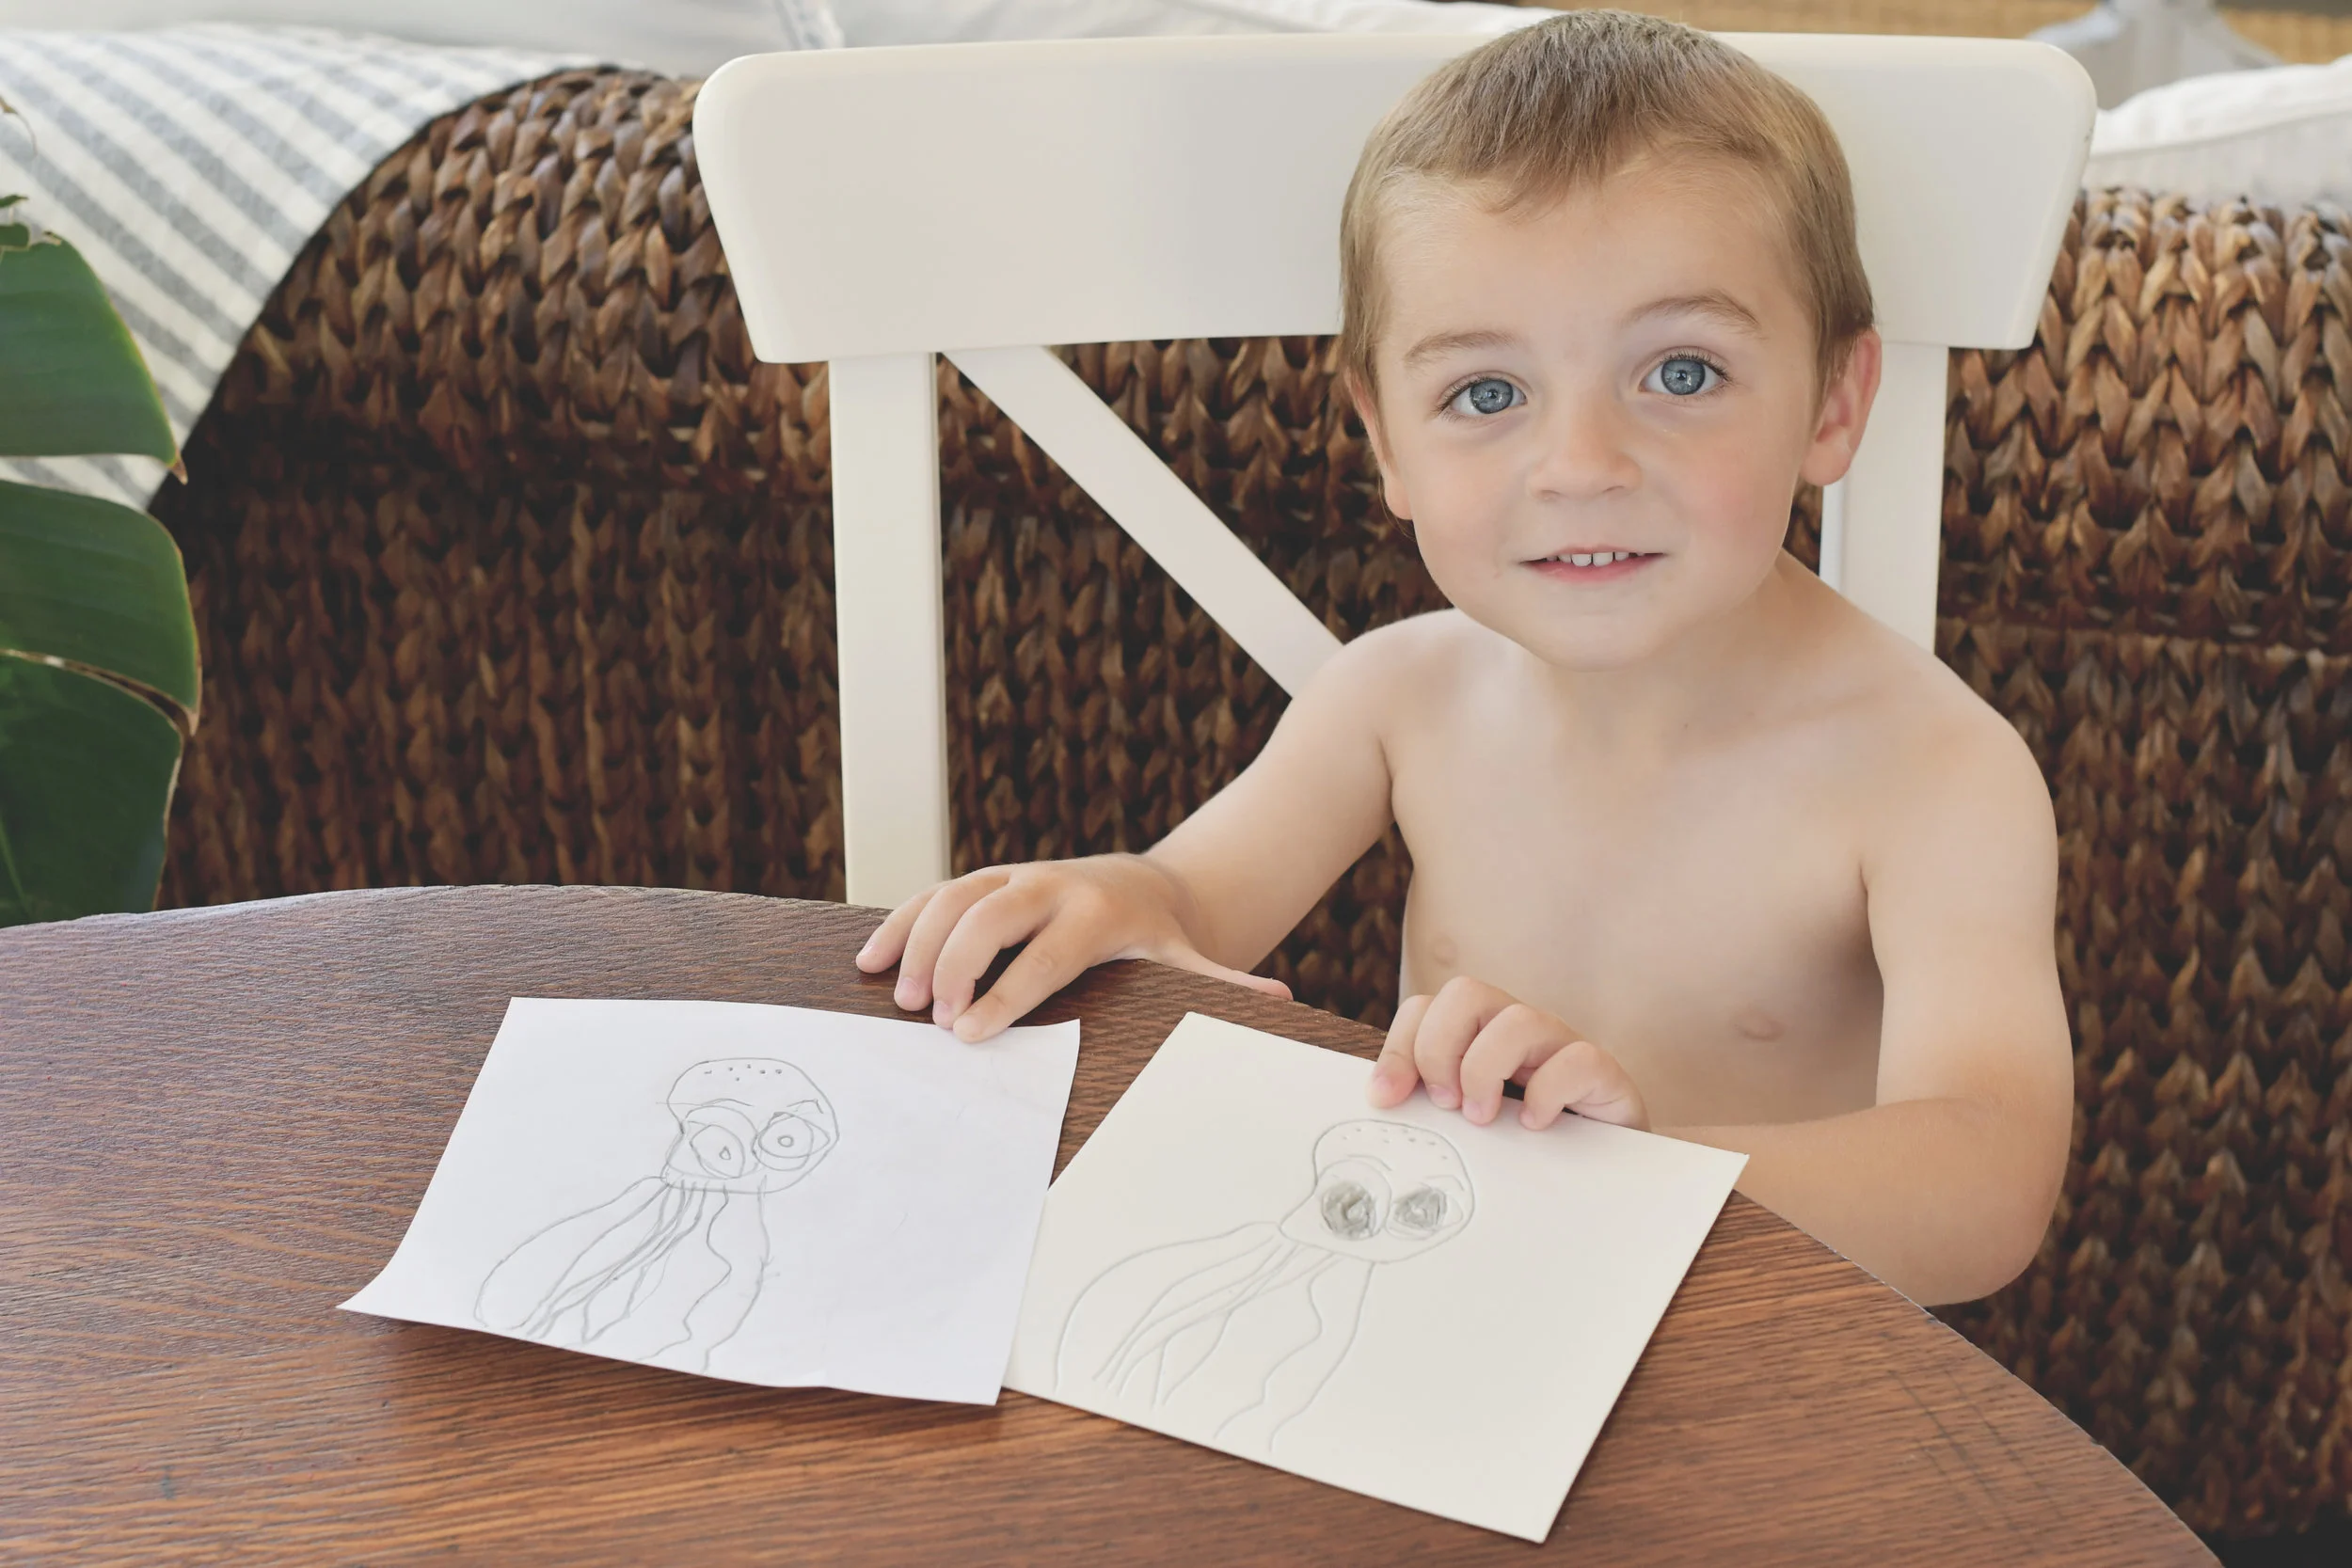
The first thing you’ll want to do when printmaking with your kids is to decide on a subject to draw/print. We’ve printed MANY times and drawn subjects such as cats, whales, flowers, etc…, so really any subject will work. For this particular print, we chose an octopus as our subject.
Next, you’ll want to decide what size you want your kids’ prints to be. The Scratch Foam that I had was in 9”x 12” sheets, and for the octopus, I cut it down to 6” x 6” for each print. I then cut scrap paper down to the same size for sketching. The paper that you’ll be using to print on should be larger than the foam, so I cut ours down to 8” x 8”. It doesn’t matter what size you do, as long as the printing paper is about 1-2 inches larger than the foam.

Step 2 - Sketch your subject
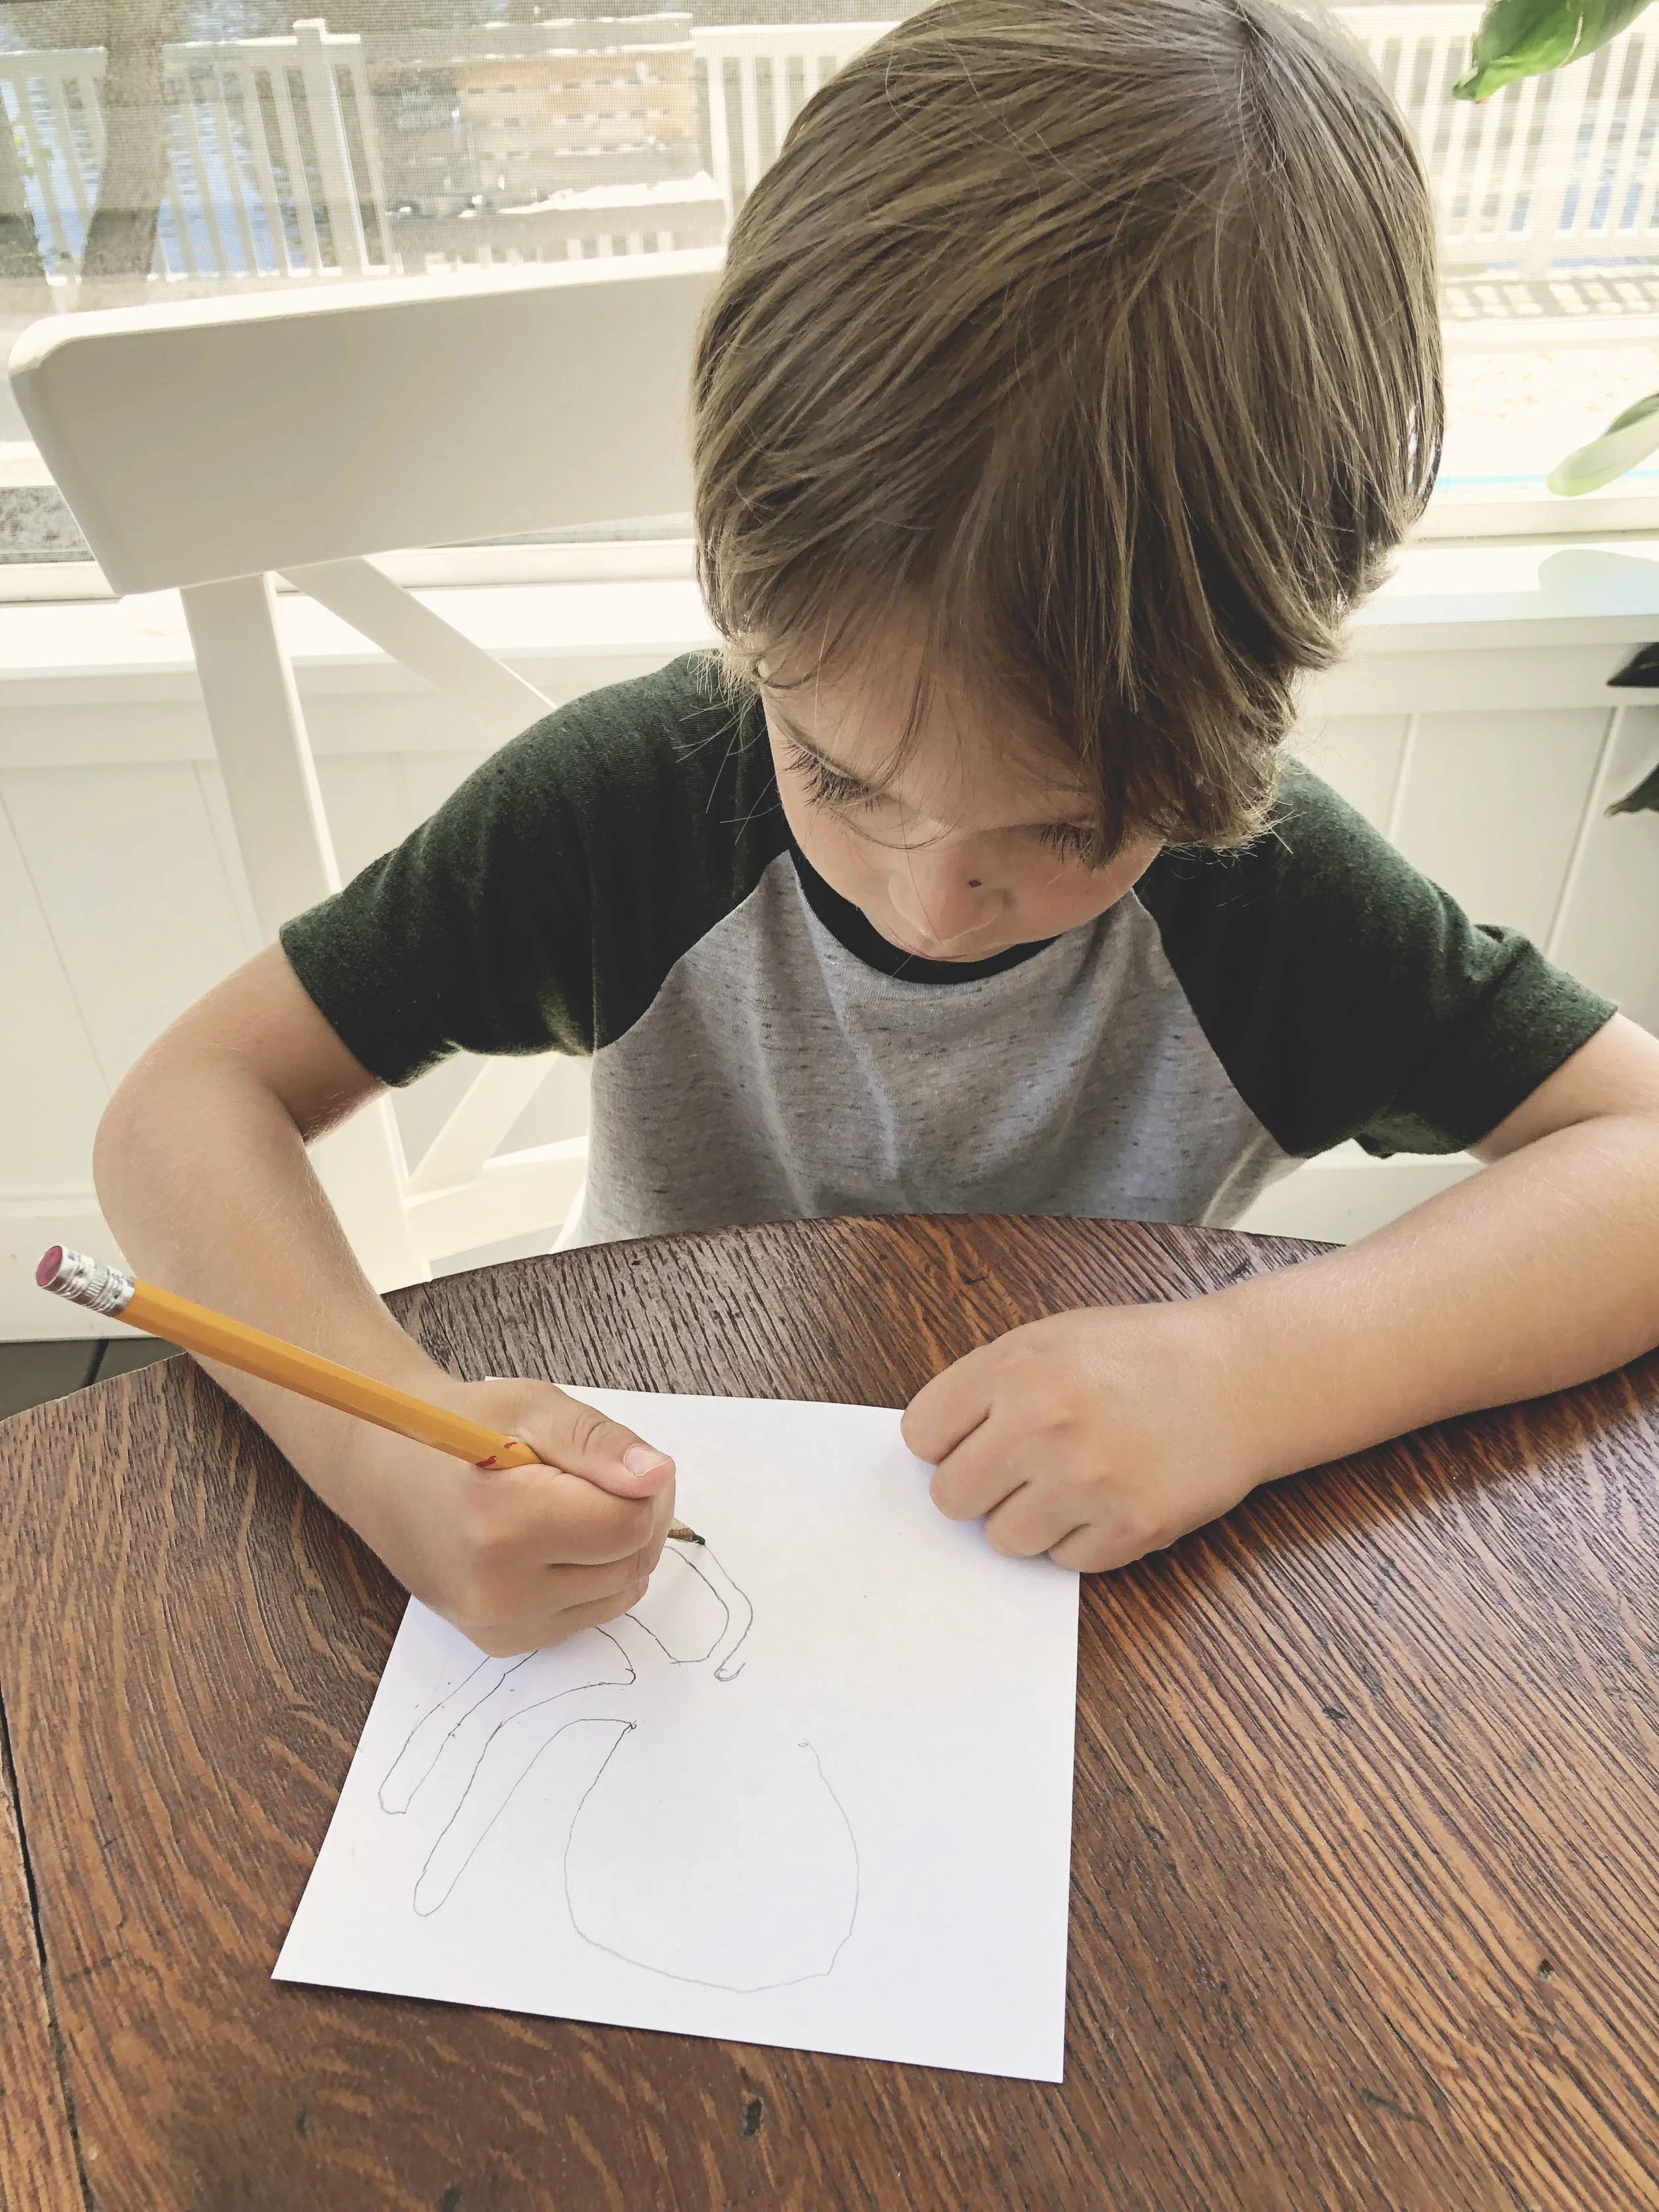
Before carving the foam, it’s usually a good idea to have your kids practice drawing their subject by sketching it out first.
Since my kids are only 3 and 5 years old, I usually do this step by step with them. I draw on my paper one step at a time, while they follow on theirs.
Remember that when you’re printing, whatever you carve will NOT receive ink, and will therefore be white, and whatever is not carved will be raised up and will be black. Also remember that the print will be a mirror image of the original sketch and foam carving, so it’s not really a great idea to add letters, numbers, or words.

Step 3 - Carve your foam
Once the sketches are finished, use a dull pencil to carve the octopus design into the foam. Remind the kids that this CANNOT BE ERASED since it is creating indents in the foam. They also must press pretty hard. If the pencil starts to cut through the foam, the pencil is probably too sharp. Instead of drawing free hand on the foam, I had my kids lay their sketches on top and trace their designs. If you choose to do it this way, just make sure you’re pressing hard enough for the design to transfer. Once transferred, you’ll have to remove the sketch from the foam, and then trace over the foam again to make sure the design is carved deep enough.
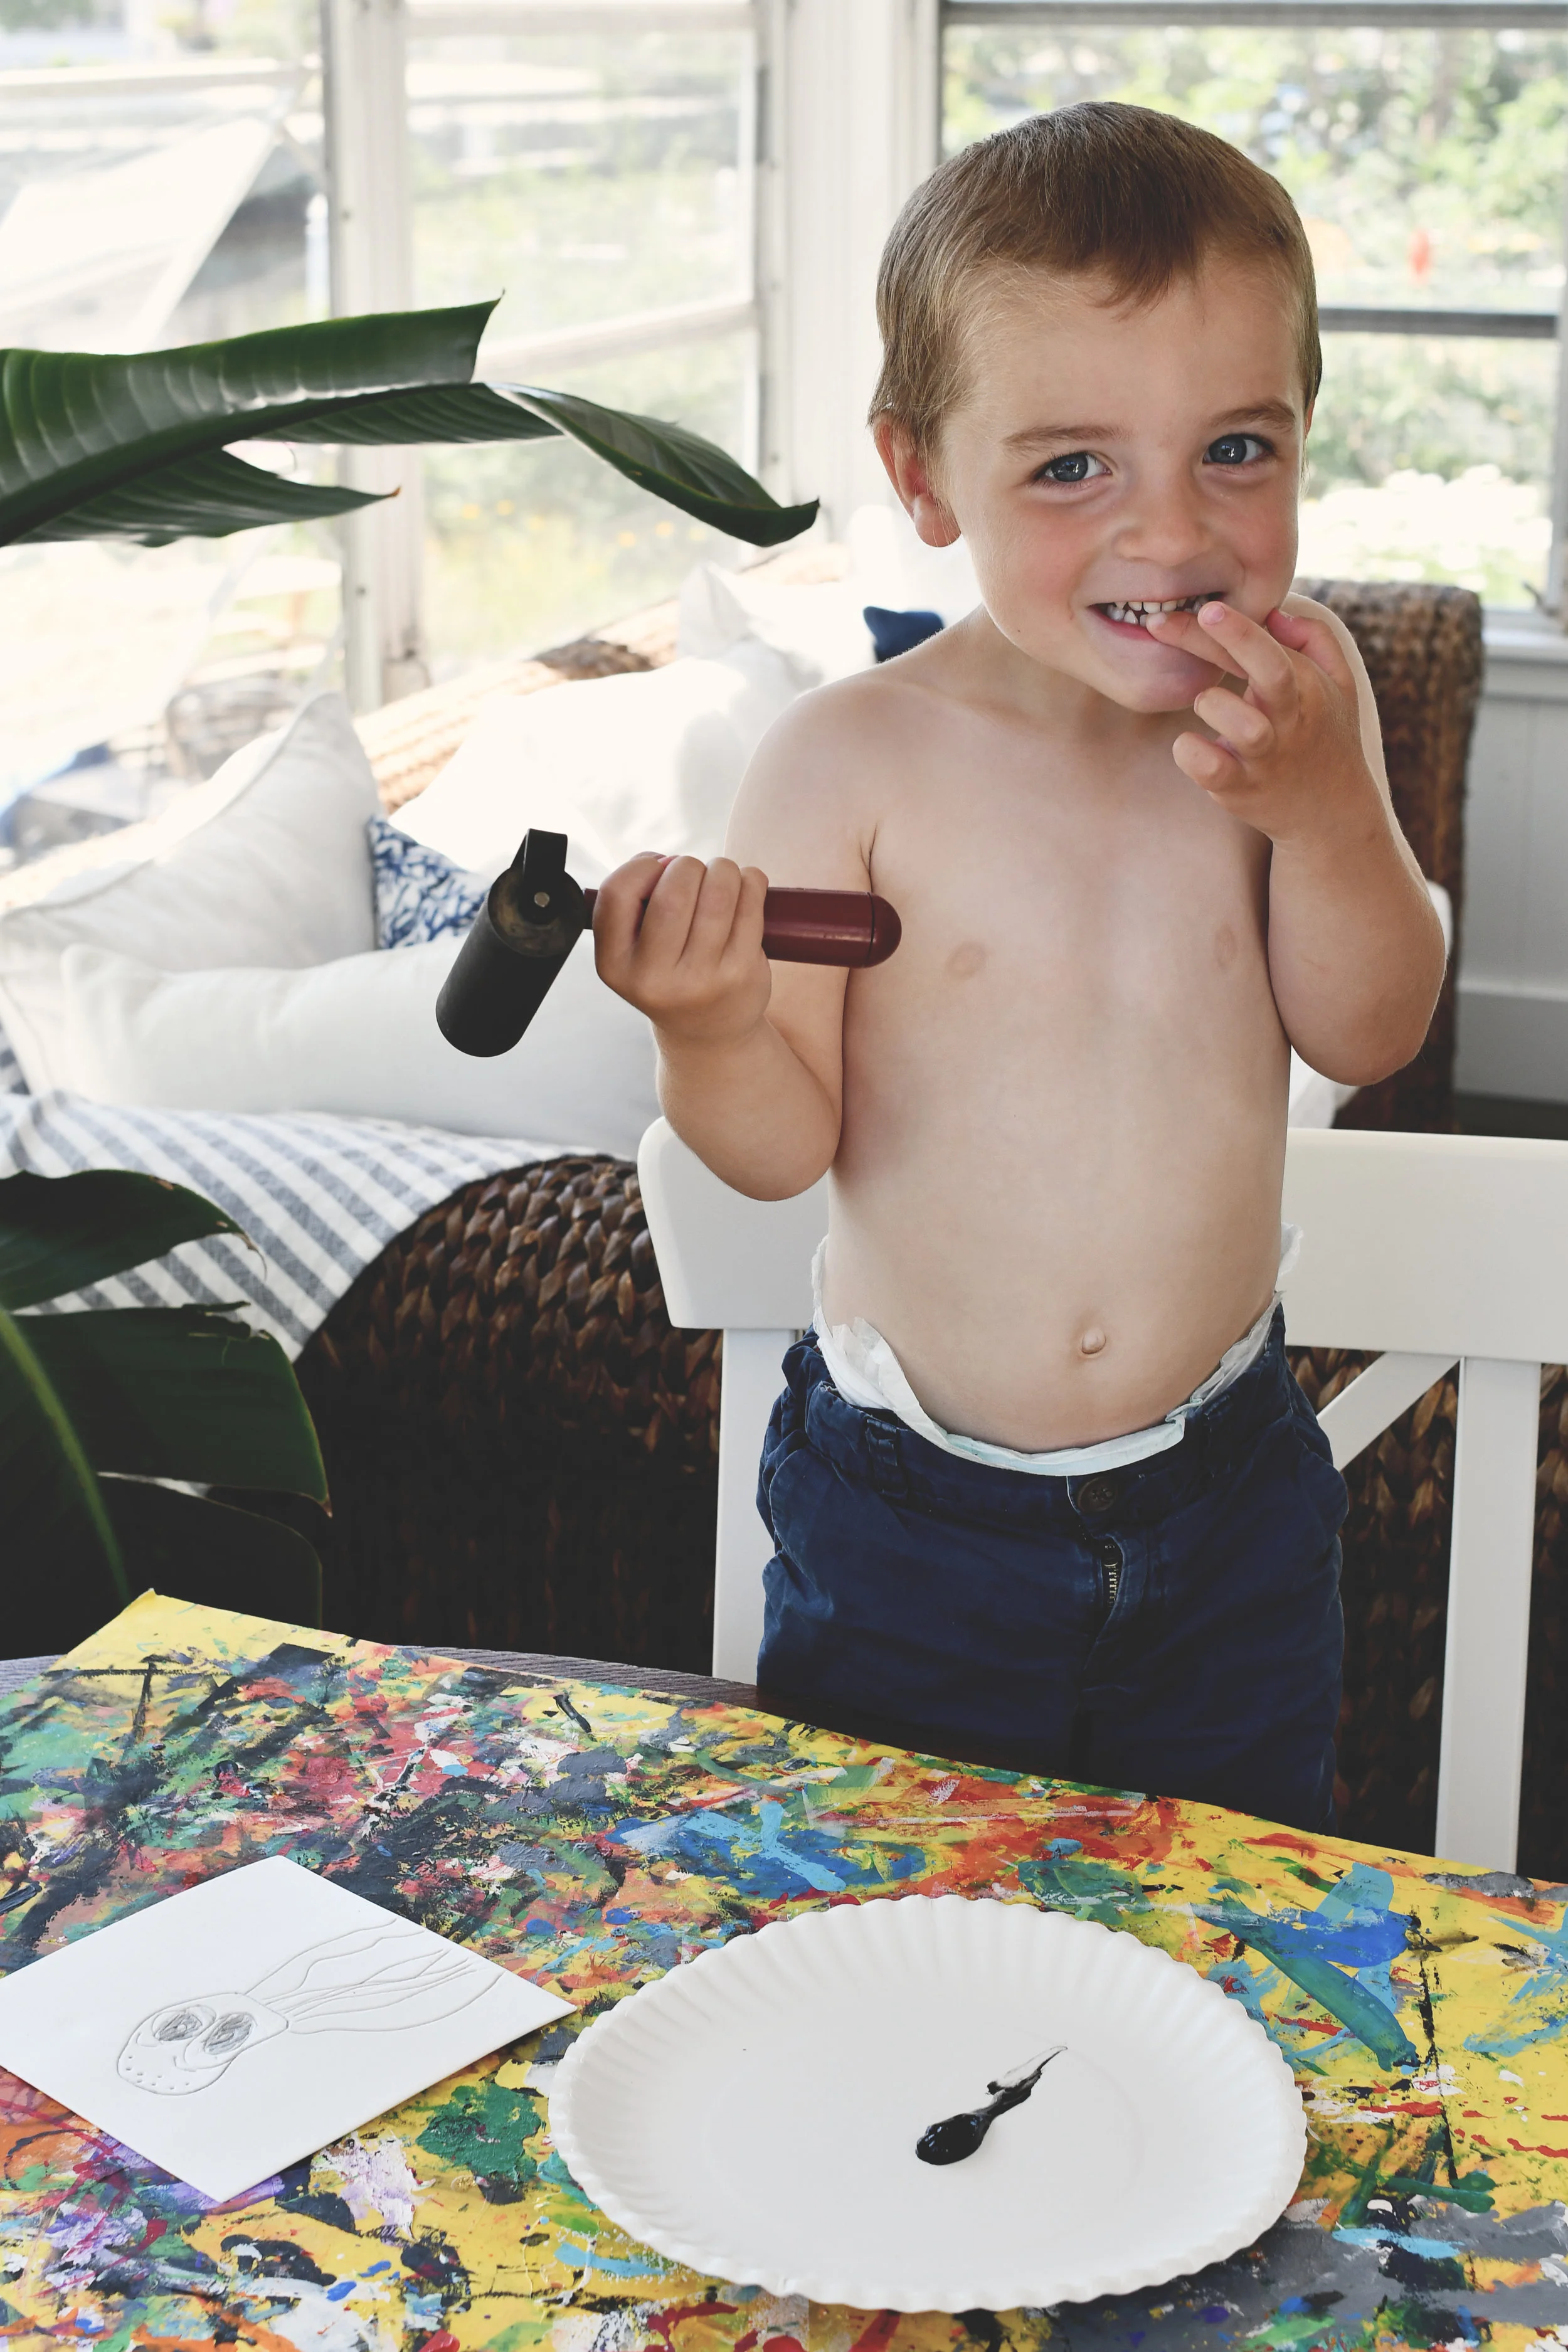
Step 4 - Prepare and ink foam
To print, you need to put about a quarter sized dot of ink on your ink plate. You can keep adding more ink to the plate, but if you had too much all at once, the ink will fill in the carved spaces on the foam plate, and the image will not print. Once the ink is on the plate, have your child use the brayer to roll the ink out nice and smooth in both directions. When it looks smooth, and makes the sound of Velcro being pulled apart, it should be good. Have your child use the brayer to roll ink onto their foam. Make sure all of the foam is covered.

Step 5 - Print!
Before printing, move the foam to a clean spot on your table so none of the ink that may have gotten around the foam prints onto the paper. Line up your paper the best you can, and lay it on top of the foam (always put the paper on top of the foam, not the foam on top of the paper). Now rub the paper all over…make sure your child doesn’t miss any edges or corners. When you think the entire print has been rubbed and transferred, have your child pull the paper and foam apart to reveal their print.
