bubble
printing
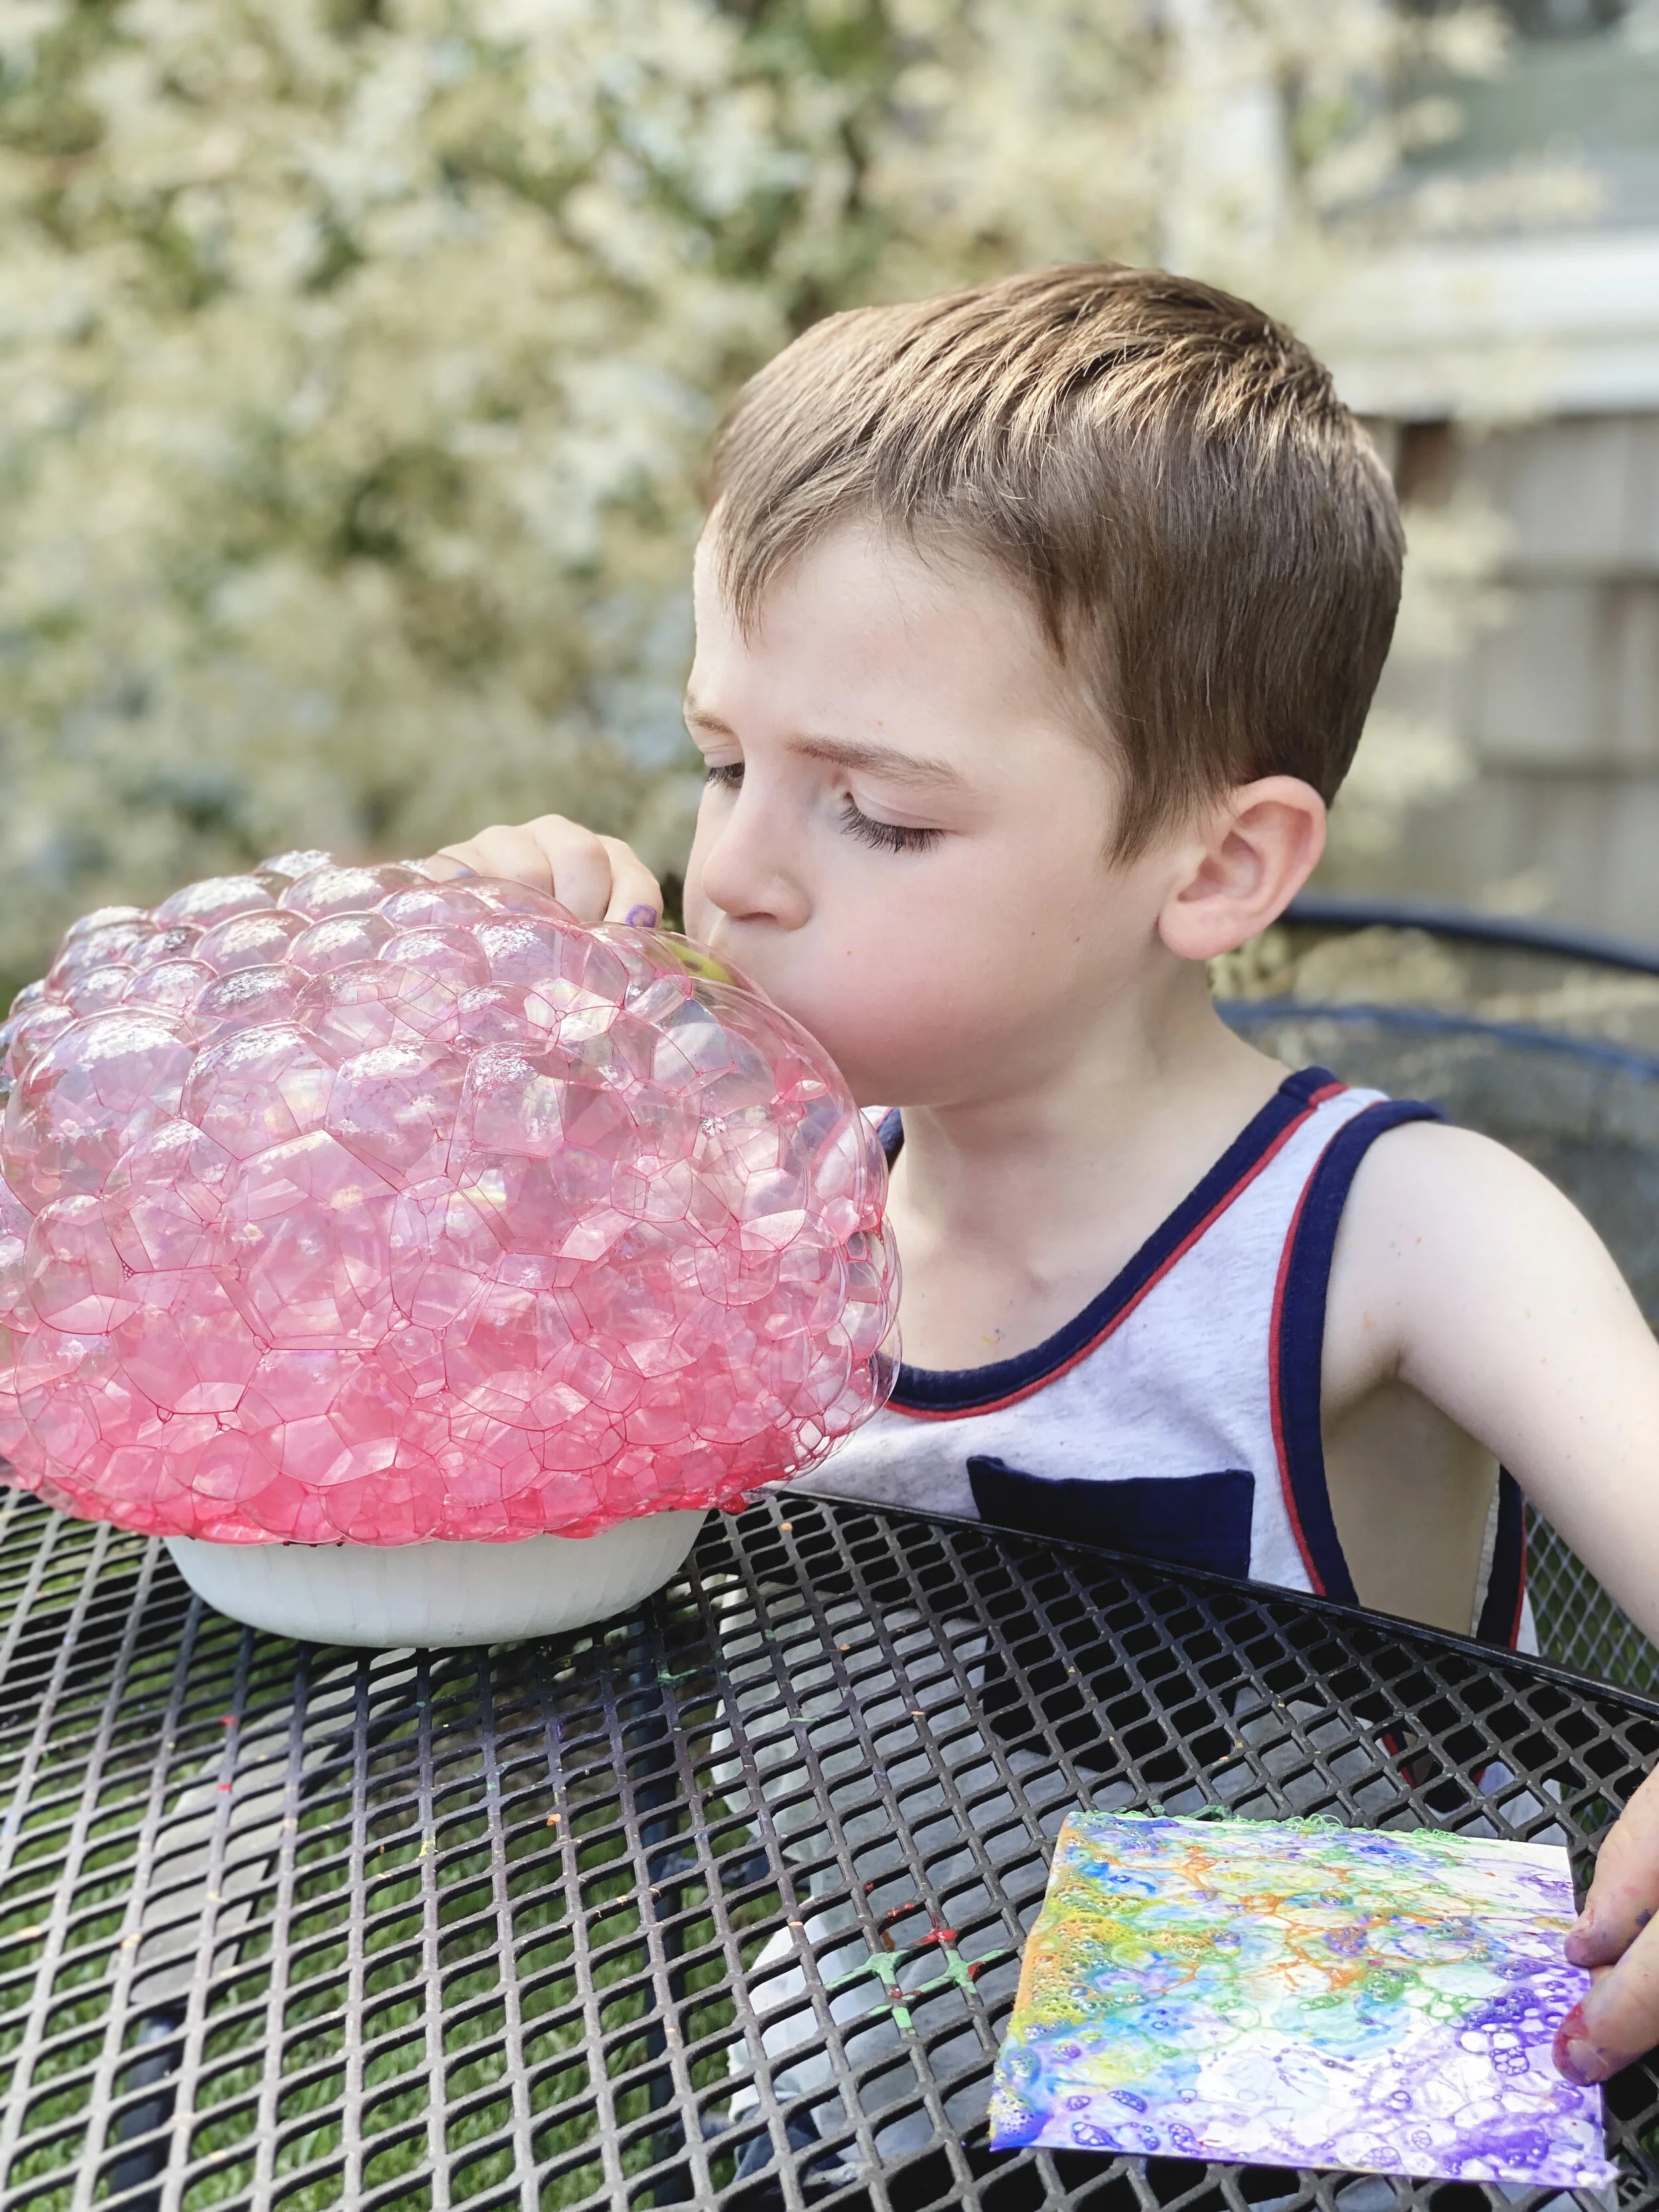
As long as your child knows how to blow into a straw instead of sucking liquid through it, he/she is old enough for this project! This is so easy and comes out very cool! But I would definitely suggest you do it outside with old clothes on!
What you will need:
Paper
Water
Dawn soap
Spoons & bowls for mixing
Straws
Step 1 - Setup
The first step is to mix all of your paint/soap/water. I usually use 6 bowls since I try to do red, orange, yellow, green, blue, and violet. In each bowl, add a good amount of dish soap (I don’t measure…I usually just squirt a bunch in, but I would say it’s at least 3 tablespoons). Then, add tempera paint (again, I don’t measure, but it’s probably around a half cup). Add some water (maybe a half cup) of water and mix each bowl. I have tried this with acrylic paint since it’s usually all I have, but tempera works MUCH better!
Step 2 - Test the solution
Grab a straw (preferably one for each color), blow into each bowl (one at a time) until a large pile of bubbles forms. Then, just lay your paper onto the bubbles, making sure that the paper doesn’t touch the liquid. If bubbles aren’t really forming, you need to add more soap. If the colors are dull, add more paint.
Step 3 - Print
Once the solutions all look good, you are ready to print! Cut your paper to the size you want (any size works!), and have the kids blow into whatever color(s) they want (using their own straws), and then print their bubbles. Bubbles will overlap and they can use as many colors as they want.